
by | | Guides & Help
Its been several months since I moved from the Windows world to the MAC world (at least at home). But until today, one of the things that annoyed me a lot was the fact that everytime I dragged and dropped a website URL to my desktop to access it later, a .WEBLOC files was created. These files are compatible with Safari Mac Browser, but Windows doesnt know what to do with them. I needed a solution to be able to open the shortcuts of pages I create with both Windows and Mac computers.
So after searching online I found this post on Apple Forums, where a good samaritan called MarkDouma created a free little application called Webloc Finagler for OSX to just drag and drop the Webloc files and the app will convert them to .URL files. The created files will be pointing to the same website and fully compatible with both OSX and Windows :).
You can download the little App for free from this direct link.
One more time, Apple decided to go out from a widely used standard and create their own. If Apple really wants more people on board, they have to makes easier for Windows users to feel tempted on migrating. I am in favor of creating new standards if they actually are better, but you cant ignore what already exists, it must be backwards compatible too.
by | | Guides & Help
Sometimes you want to paste a captured image with Snagit into a Gmail new mail and you just see an empty box instead of the image. The problem is the depth of the image captured by Snagit, and here is how to fix it.
For existing images you already captured you can do the following
In Snagit Editor (while watching the image you captured and can’t paste in Google Mail), go to the tab “Image” and then go to “Color Effects” then choose “Color Depth” and then change the drop down menu to “True Color 24 bit”. Now you should be able to paste the images without any trouble in Gmail.
If you want to make this change permanent for all the images you capture
Go to the capture profile settings, choose the little arrow beside “effects” and then go to “Color depth” and choose “Custom color depth“, set it as “True Color 24 Bits” and to end click Ok.
From now onward, every image you paste in Google Mail will work.

by | | Apple, Guides & Help, Reviews, Soft
I was struggling with my Microsoft Lifecam Studio webcam because it was not working properly.
I have a Retina MacBook Pro 15″ (late 2013) and I test the camera with the PhotoBooth app on Mavericks. All I was able to see was a super burned white-colored image.
After researching online for solutions I came across this program on the App store that costs USD 8. I must say, it was worth it, because from the moment I installed it, the problem was solved. Now I am able to use my camera without any troubles. (more…)

by | | Desktops & Laptops, Guides & Help
Some days ago I received my new 27″ screen to place on my desk together with my MacBook Pro. And I knew that once I had the screen, I would have to make some space on my desk. The main idea is to save space by placing your MacBook laptop in vertical position and not how you would normally use it. As I will only use the 27″ thunderbolt screen when at home, I won’t need the laptop to watch its screen anymore… (more…)
by | | Apple, Guides & Help
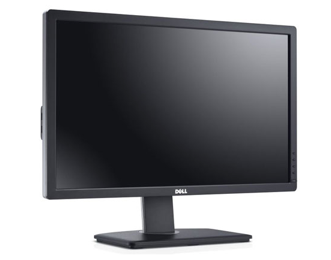
Yesterday I purchased a Dell U2713HM a 27″ display that gives me up to 2560×1440 resolution.
I connected it with an HDMI cable to my Retina MacBook Pro 15″ (late 2013). At first it didn’t work as expected, and I was getting “only” full HD resolution, I knew this was a possibility because I was not using the correct cable. You need a Mini Displayport to Displayport to get the full possible resolution, I purchased the cable but didn’t arrive yet.
Today the cable arrived so I plugged the new screen to my Mac, and surprise! It didn’t work either. 🙁
I was getting a strange resolution, and then I was able to get full HD again, the most, but not the full juice.
I started reading online and found a lot of suggestions, unplug, restart, reset SMC and more. I realized my laptop was almost new, and I could call Apple support. So I did, but unfortunately Daniel, the support representative was as lost as me. While he put me on hold (he was asking somebody else), I found the solution online.
It seems the EDID (Extended Display Identification Data) in Mavericks was not right for my new monitor (I also read this solves the problem for other Dell Models U2711 & U2713H). Fortunately, from this link (I also made a mirror here just in case) I could download a ZIP file which contains the correct EDID for these Dell monitors.
I just download the file, and uncompress it. Then copy the folder to the following path: /System/Library/Displays/Overrides. Then restarted and the display will work as it should have the first time, full 2560×1440 no problems!
Note: In my case, I got a bad start first, and then the computer started correctly so everything was ok. I’ve noticed it took a couple more seconds than what a normal reboot would take.
Just when OS X was restarting, Daniel (the Apple supporter) came back to me. I explained him what I just did and he was surprised of the solution. I gave him the information and he told me that he will report it so the engineering team can prepare an update for Mavericks.
For the time being, you have the tip here, hope this can solve your problem the same way it did for me. Now, I am enjoying full resolution on my 27″Dell screen :).

This is the model of my Mac, just in case somebody es interested

by | | Guides & Help
I discovered this today and its very useful, so I decided to share it with everybody.
Till now I was able to insert an image in whatever region of a Google Spreadsheet by going to “Insert” > “Image“. But this wasn’t fixing the image to the cell you wanted to place the image to.
As explained on this Google Drive help link, you can enter a URL of an image directly into a cell like this: (more…)